Creating Research Outlines
Introduction
Research Outlines in Perspective are used for context building and ensure that Perspective asks the right questions to get you the insights you're looking for. This article covers the following topics:
- Introduction
- Creating a Research Outline
- Trying the Interview Experience
- Customizing the Interview Experience
- Inviting Interview Participants
Creating a Research Outline
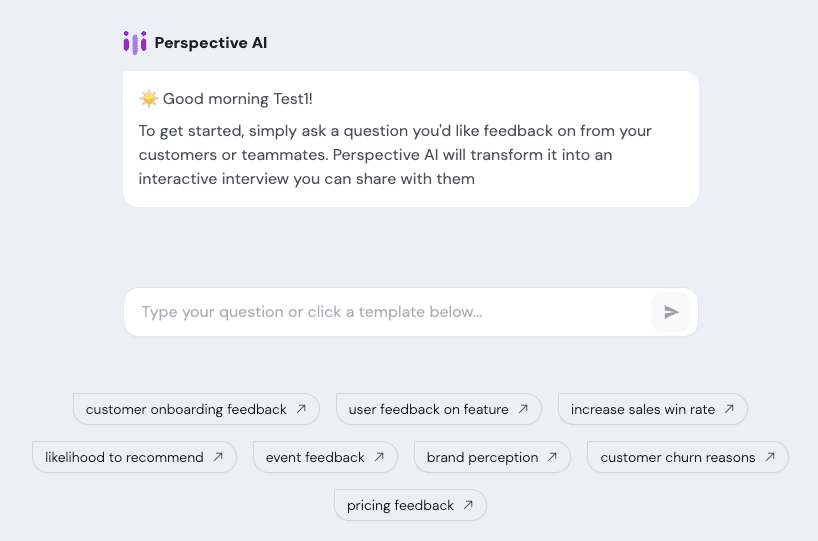
To create a new research outline, navigate to the Home section. Here you'll either:
- Write your own research question
- Select from recommended research questions, which are based on the information in your personal profile.

Research Start Screen
After you've selected a recommended research question or written your own, Perspective will launch into an interview experience where it will ask you questions to gain a better understanding of your research context and goals.
At the end of the interview, you'll have a complete research outline.
The Interview Process
The interview process usually takes less than 3 minutes and covers:
- The purpose of the research
- Who you are and how this research is related to your role
- Who you'll be interviewing
- Any specific hypotheses you have
- Mandatory questions for participants
Trying the Interview Experience
Once you've finished creating your research outline, you have the ability to take the interview as though you were one of the interview participants. We always recommend trying the interview before moving on to invite participants.
If you want to make changes to the interview after taking it, simply tell Perspective what you'd like to change. Perspective will generate an updated Research Outline and corresponding interview with each additional prompt you give it.
Once you're happy with the interview, it's time to move to the next step.
Customizing the Interview Experience
To ensure the highest number of completed interviews possible, it is recommended that you customize the theme and interaction settings to clearly communicate the purpose of the interview to participants and align the interview experience with your brand.
Customize Interaction Settings
The interaction settings allow you to customize the following:
- External Interview Title and Welcome Message - This is the first thing interview participants see after they click on the invite link.
- On Behalf Of - This is the person or organization who Perspective is conducting the interview on behalf of (e.g., "John Smith," "Acme Co.").
- Byline - Used to communicate additional context about you or your organization (e.g., "SVP of Product," or "Customer Experience Team").
- Call To Action - Optionally display a custom button at the end of the interview. Use this to direct participants to your company website, rewards site, or any other website of your choosing.
- Thank You Email - You can send a thank you email to participants after they've completed the interview (we recommend this).
- Allow Anonymous Participants - Toggle this on at the bottom of the interaction settings (we generally don't recommend this unless there are specific circumstances that require it).
Theme Settings
Theme settings control the visual elements of the participant interview experience and enable you to ensure it aligns with your organization's branding. Specifically, you can do the following:
- Add a light mode logo (displayed when interview participants are using light mode in their browser)
- Add a dark mode logo (displayed when interview participants are using dark mode in their browser)
- Set a theme color
After you've configured the theme settings, we recommend trying the sample interview again to make sure everything looks good.
Once you've finished customizing the branding settings, you're ready to move on to the next step.
Inviting Interview Participants
The final step is to invite participants. There are three methods to choose from:
- Invite via email
- Post the link on social media (LinkedIn, 𝕏, Facebook, Gmail)
- Generate and send a QR code
You can mix and match these methods and send/resend as many times as you'd like.